How the 6D Tape treatment works
6D Tape has proven invaluable for management of scars, stimulating lymphatic drainage to reduce swelling, congestion, and tissue adhesions. It is extremely effective in releasing tight scar tissue, improving mobility, and enhancing natural healing. By softening adhesions, promoting tissue remodeling, and improving scar appearance, 6D Tape supports both recovery and comfort.
“This tape has proven useful in self-management to help stimulate lymph drainage more pro-actively. It is also extremely effective at helping release tight scar tissue – which again helps reduce localized congestion.”
— Your Lymphoedema – Taking Back Control, Lymphoedema Support Network, UK

6D Tape mechanism of action
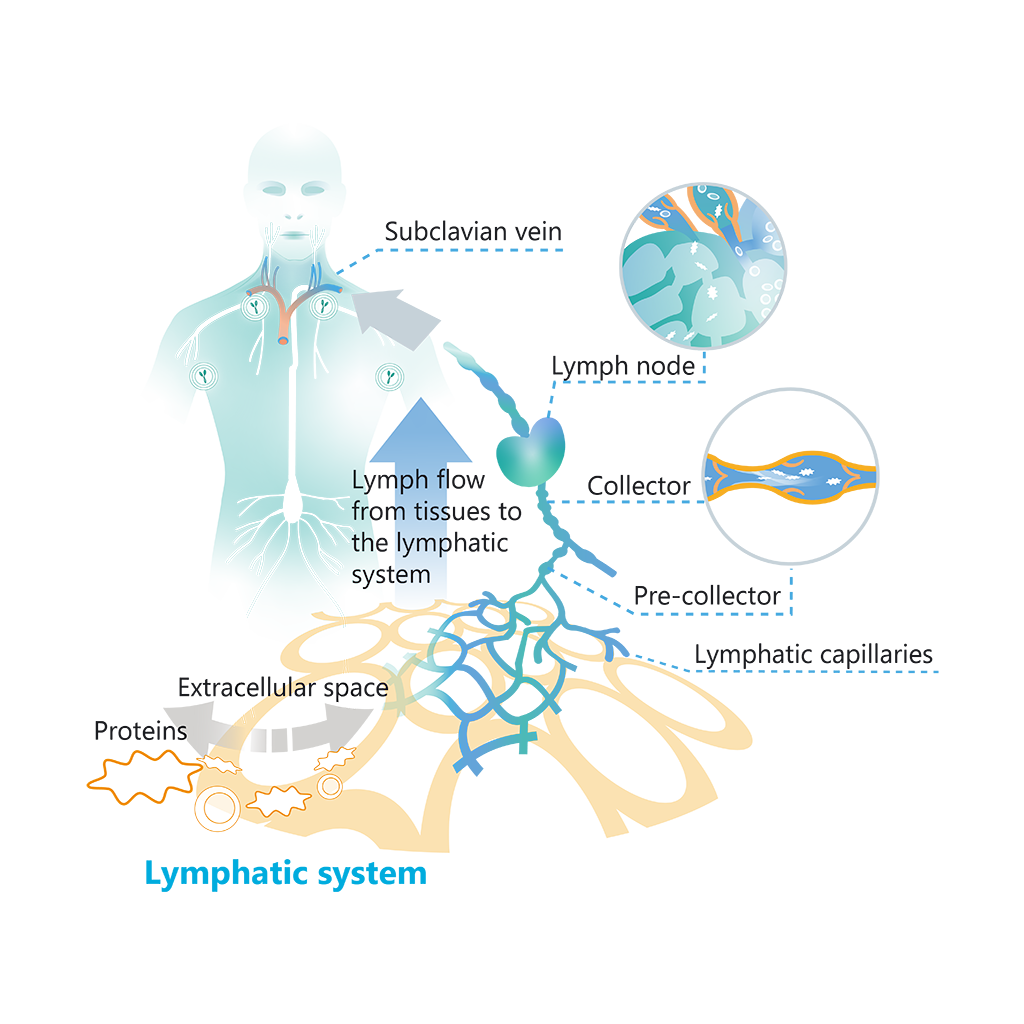
- Proteins and molecules osmotically absorb water, increasing their size—they swell.
- The swollen, fluid-filled protein cluster cluster together, unable to pass through the extracellular space into the lymphatic capillaries.
- This results in tissue swelling, or oedema.
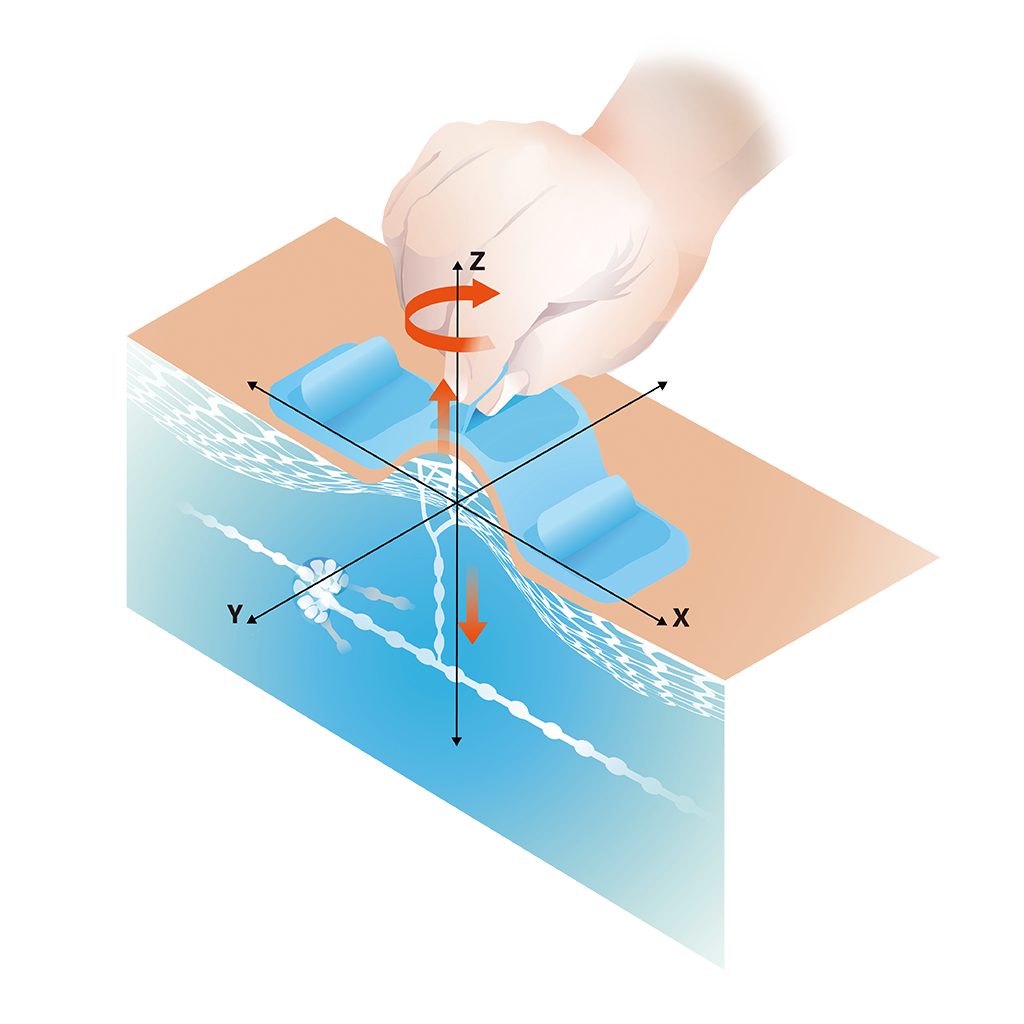
- 6D Tape works by gently moving anchor filaments, which enlarges the endothelial openings on the lymphatic capillary surface. This process allows swollen proteins, molecules, and excess fluid to enter the lymphatic capillaries more effectively, reducing swelling and alleviating pain. By facilitating this natural drainage process, 6D Tape enhances the tissue’s healing environment, promoting faster recovery and improved overall well-being.
General Steps of 6D Taping
Select the Right Piece of Tape
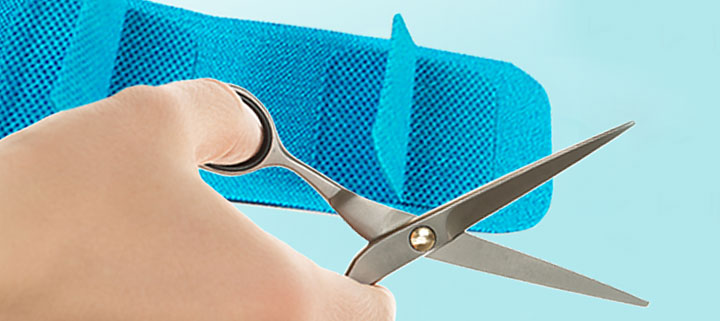
Choose an appropriate length of pre-cut tape, or cut a suitable piece from the 6D Tape roll. Round the edges of the tape to prevent it from catching on clothing.
Cleaning and shaving
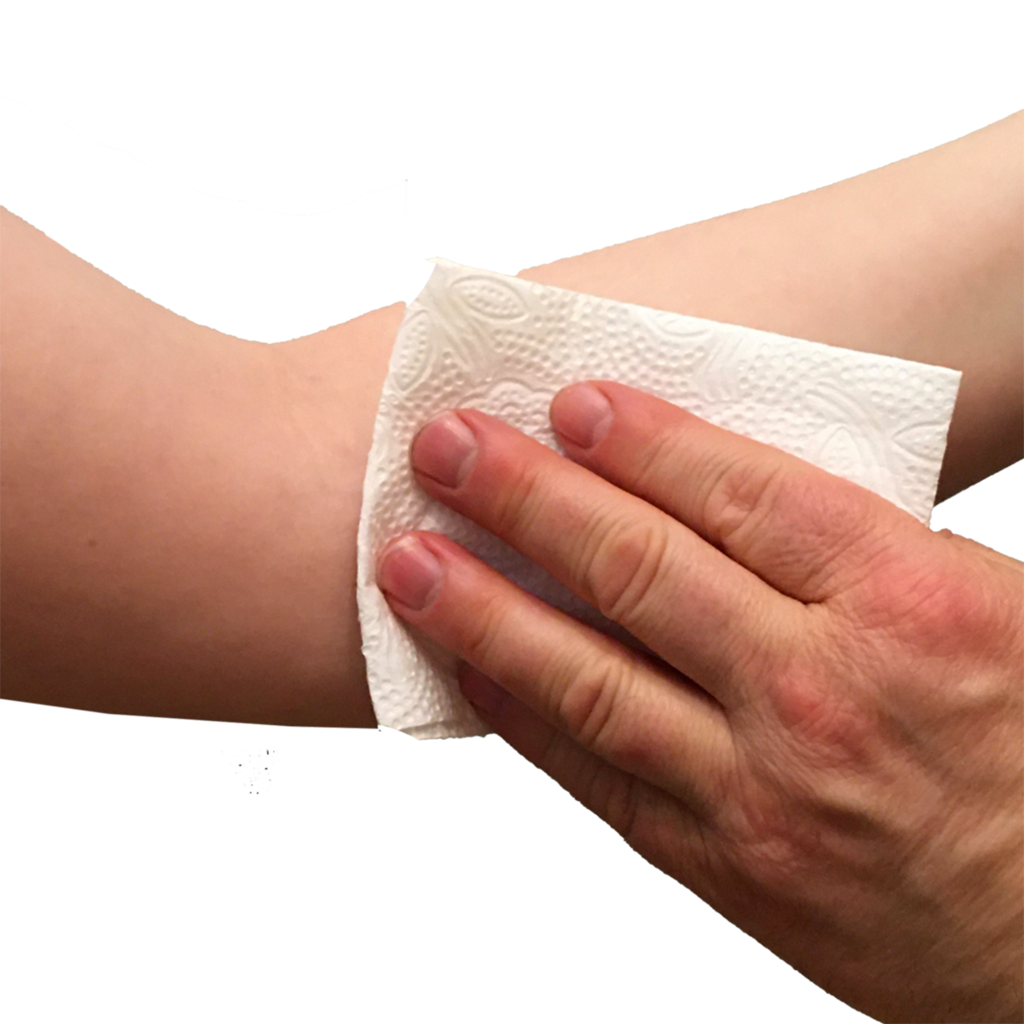
Prepare the skin by cleaning it with hand sanitizer or rubbing alcohol. Ensure the area is free of oils and completely dry, removing any lotion beforehand.
If the area you plan to tape has thick hair, it’s recommended to trim it down to ensure the tape adheres properly to the skin. However, there’s no need to completely shave the hair before applying kinesiology tape.
Removing the release liner
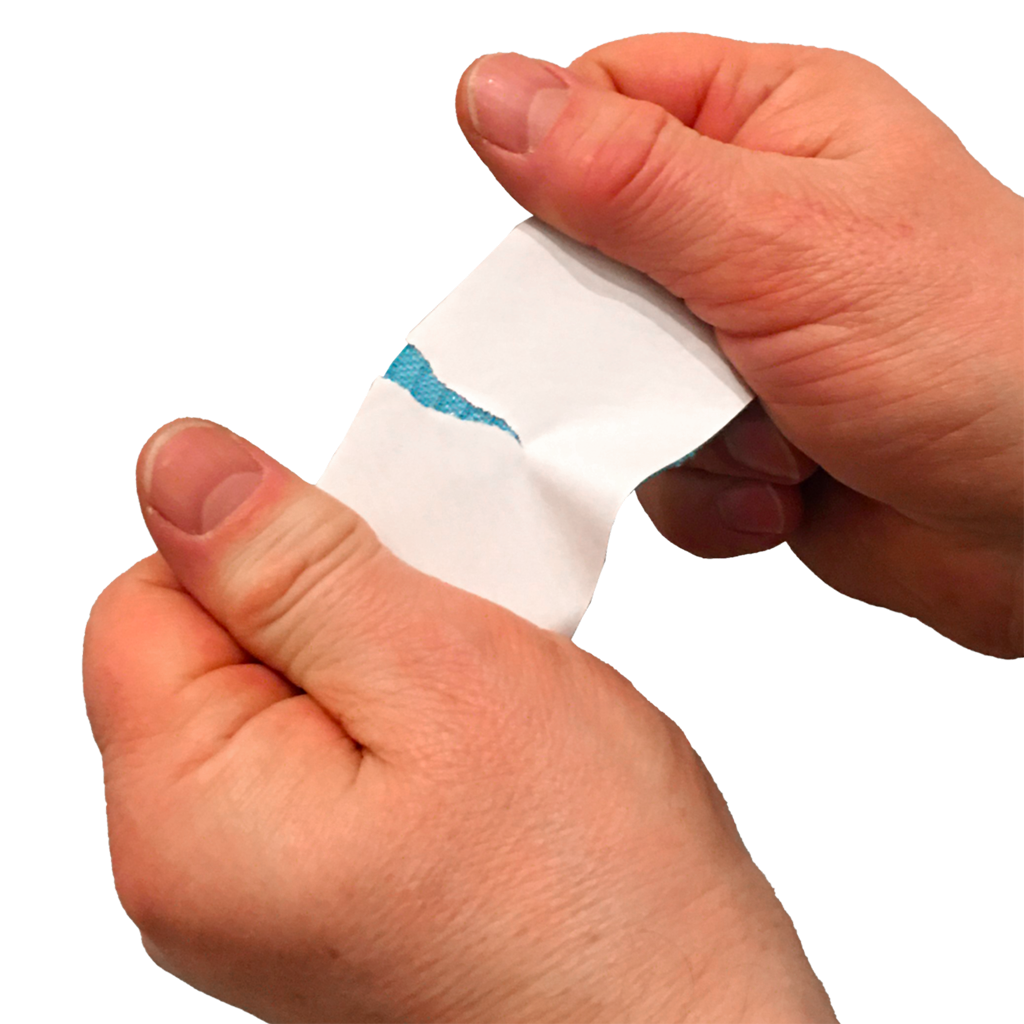
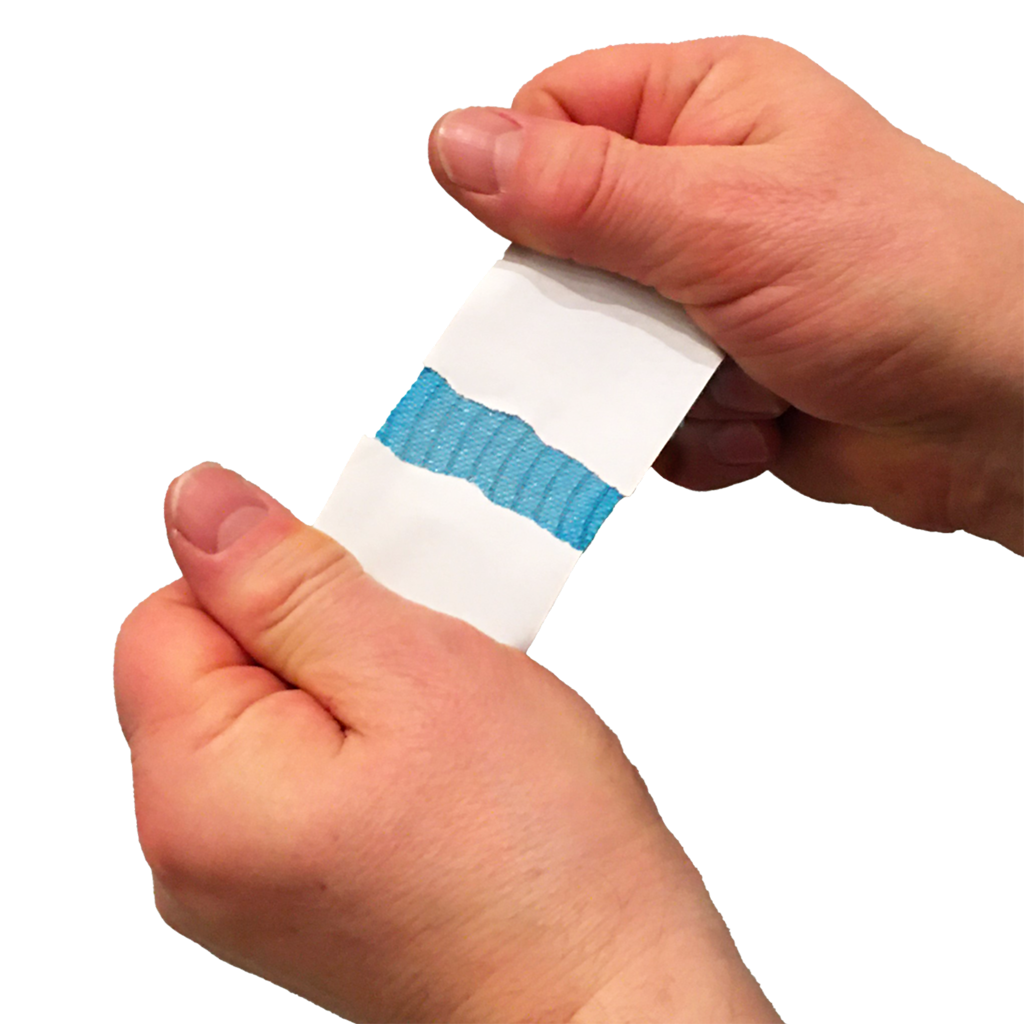
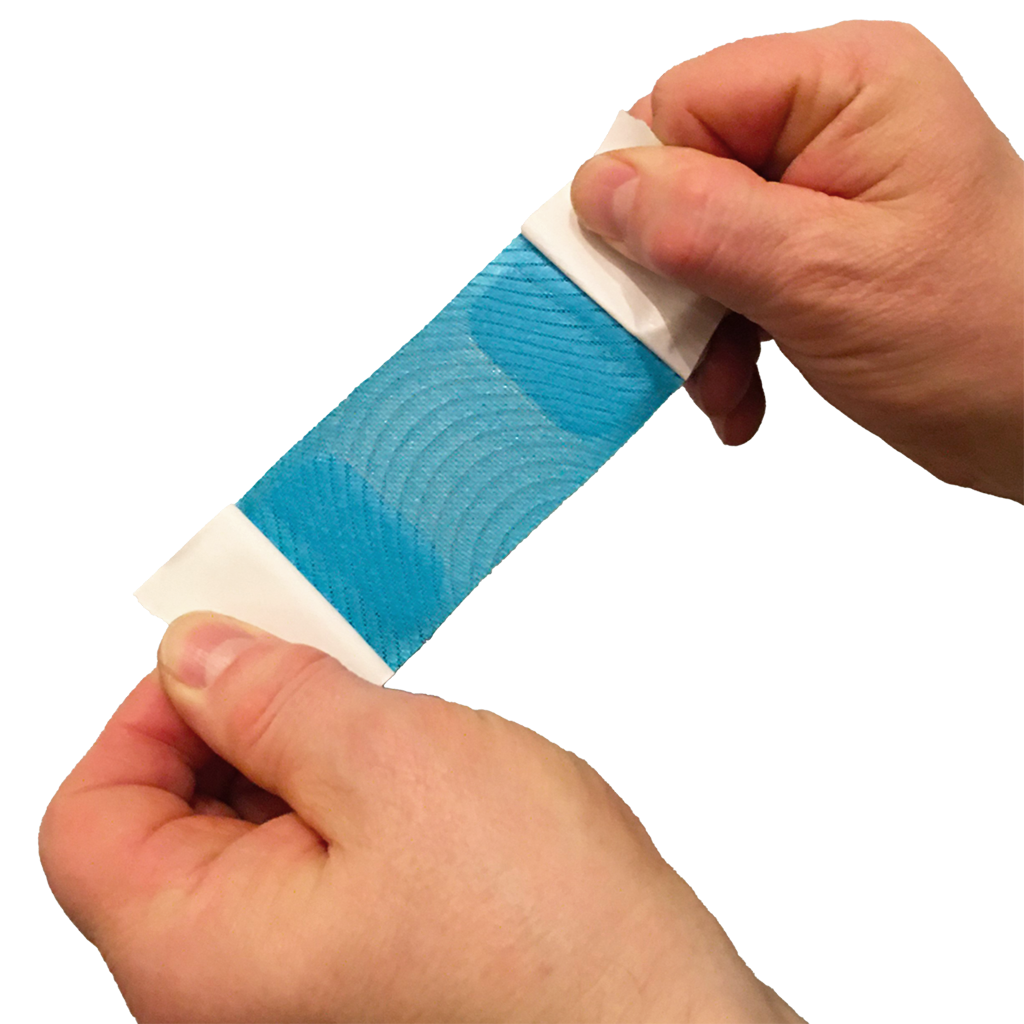
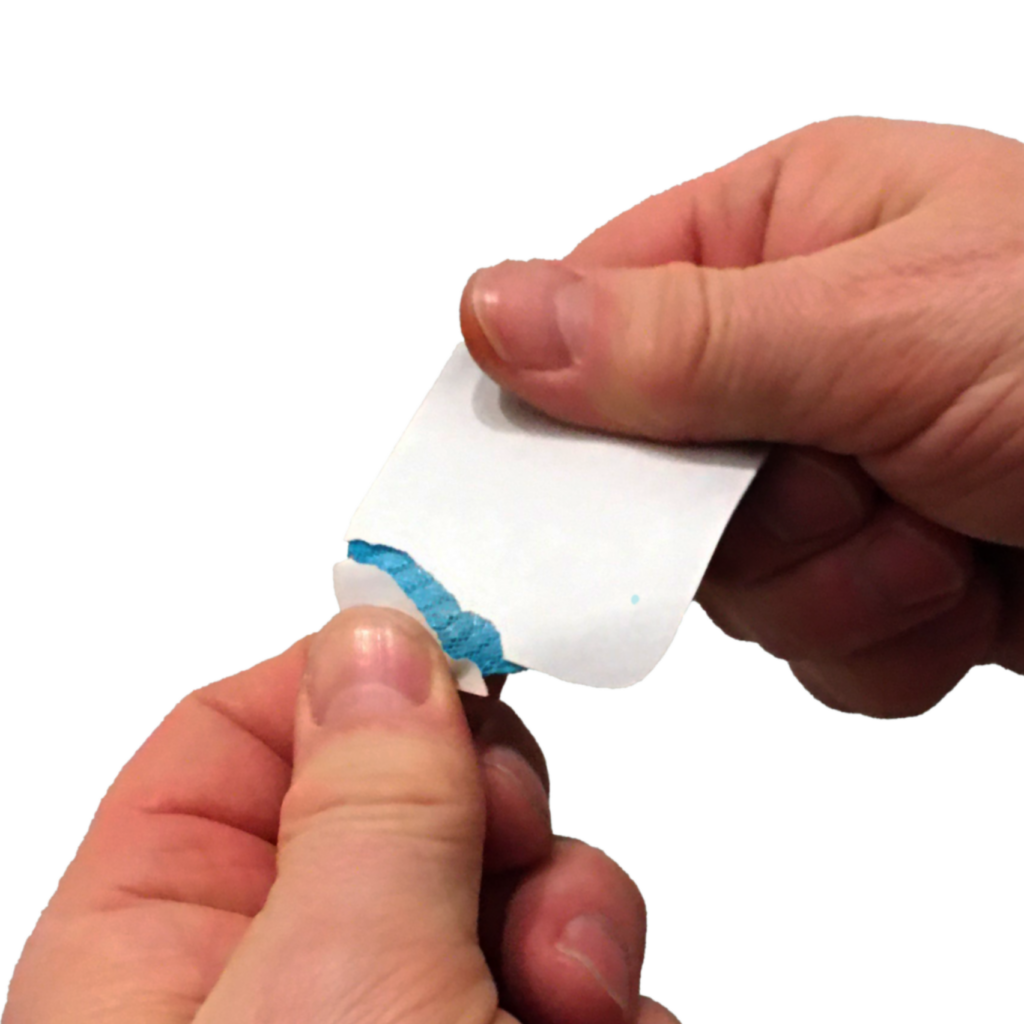
Start cutting the release liner by stretching the tape slightly between the handles in the case of the two-handled strip, or stretching the tape slightly from the corner of the tape in the case of the one-handled strip. Remove the release liner carefully, however, leave both ends of the release liner in place in order to be able to place the tape onto the skin without touching the adhesive.
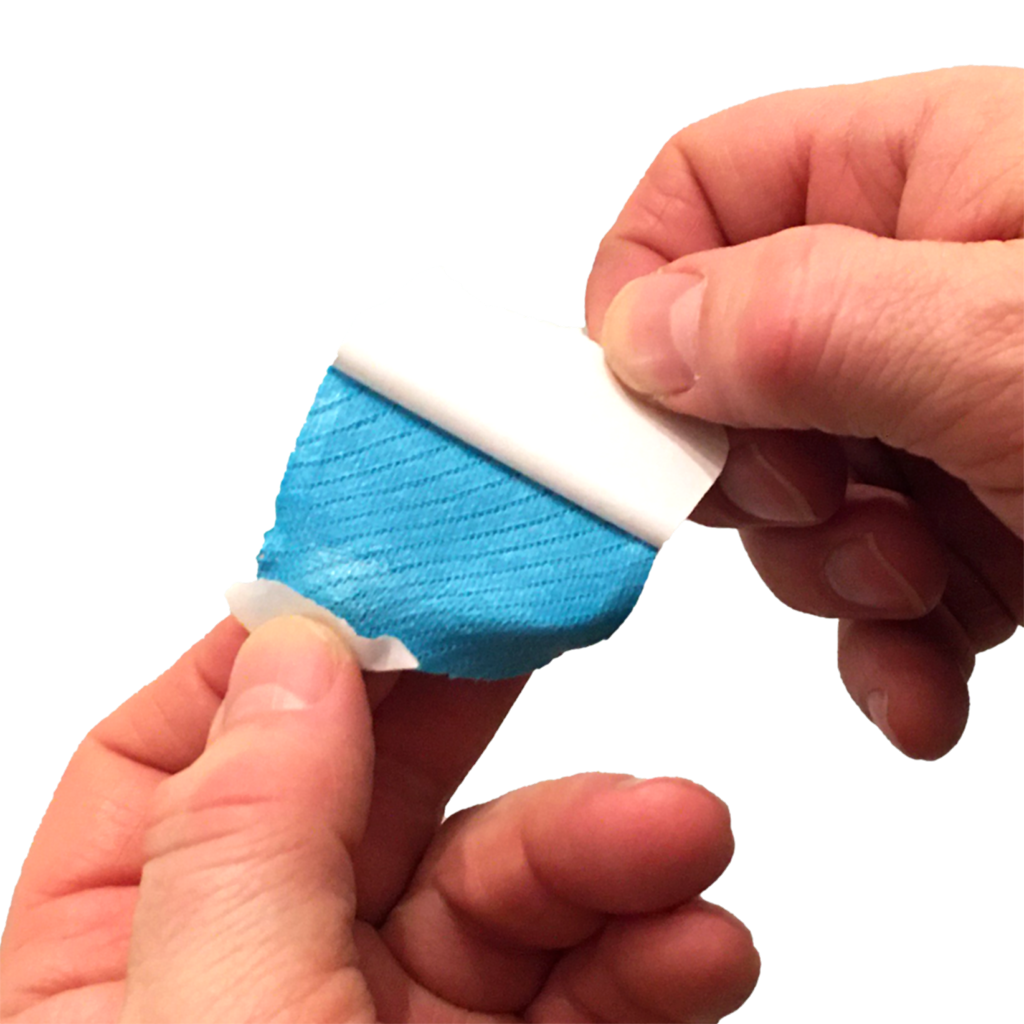
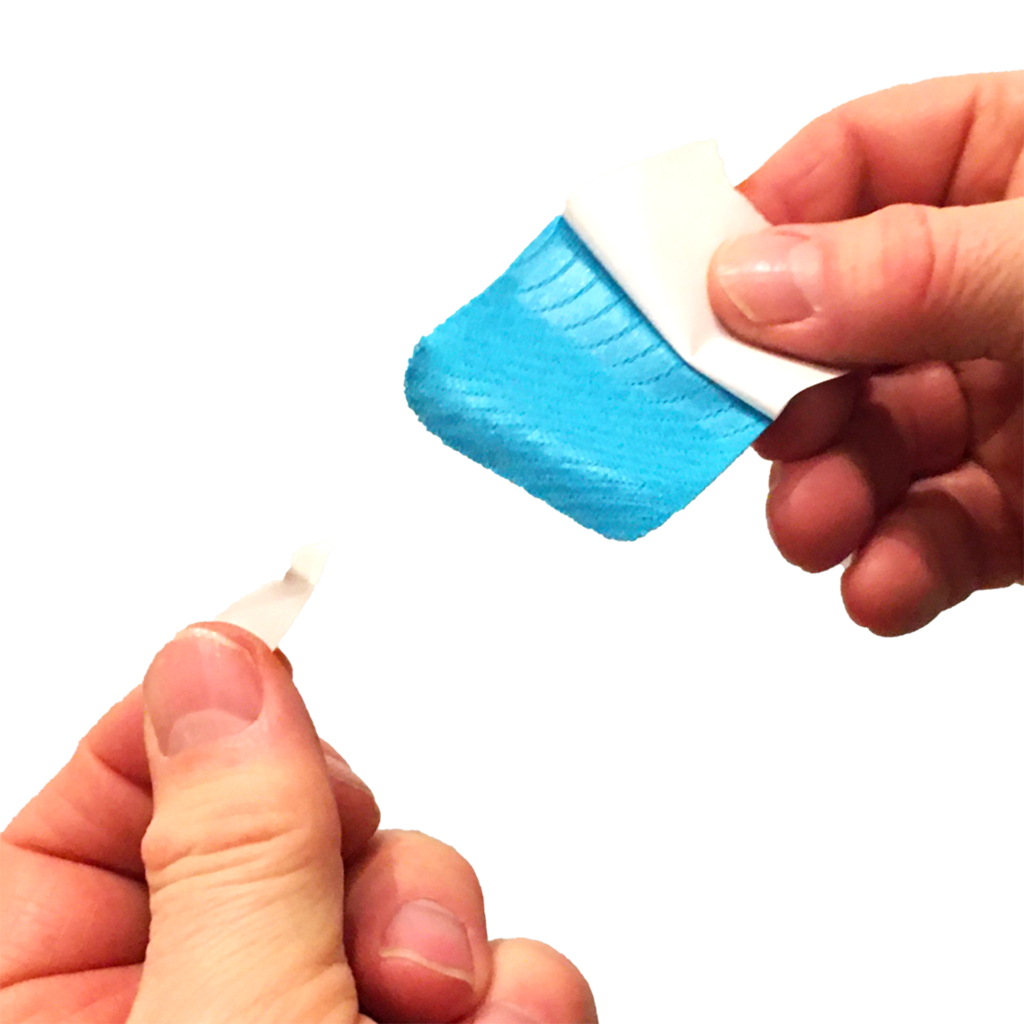
Attaching 6D Tape
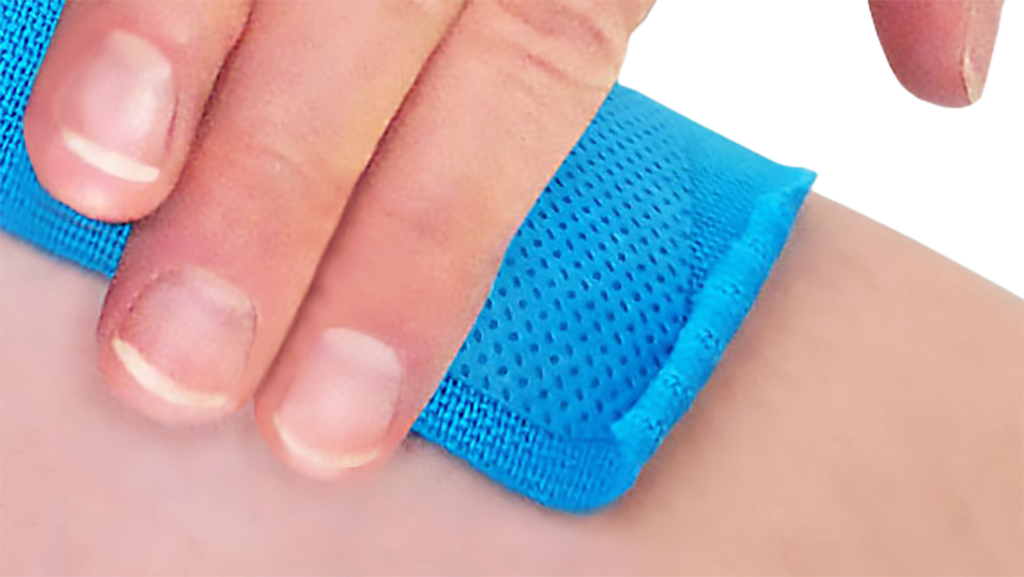
Attach the 6D Tape to the desired area starting from the middle and holding the end of the tape with the help of the release liner (Picture Series 2b). Do not stretch the 6D Tape. Avoid wrinkles. If you must stretch it to avoid wrinkles in the tape, then it is recommended to only stretch it 0–15%. If you do stretch the tape, remember not to stretch the anchors, i.e., the ends of the tape. Finally remove the release liner from the end of the tape. Repeat for the other end of the tape. Rub the tape gently but firmly from the middle towards the ends. Increase the rubbing pressure slightly with every rub to ensure a strong hold on the skin.
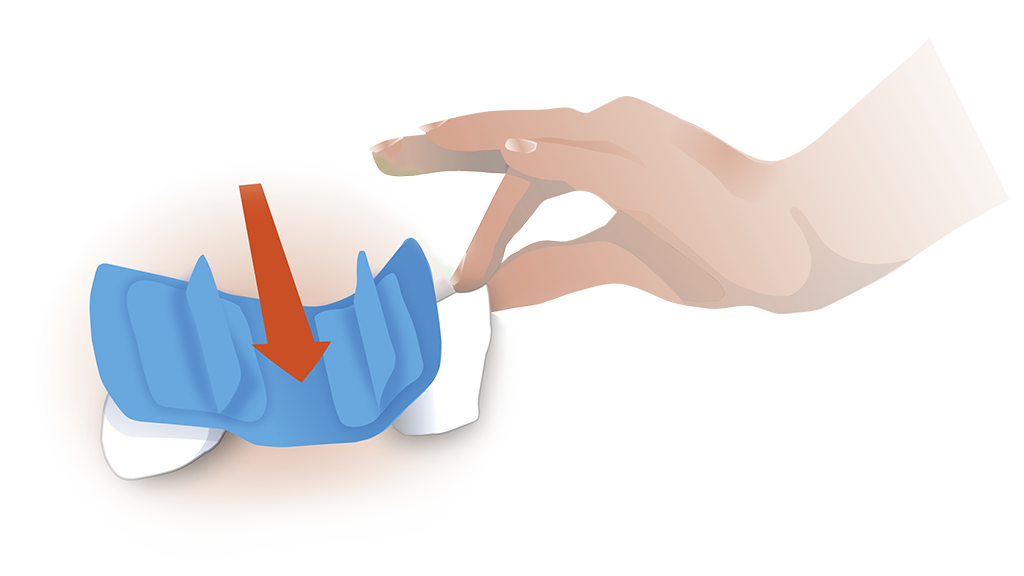
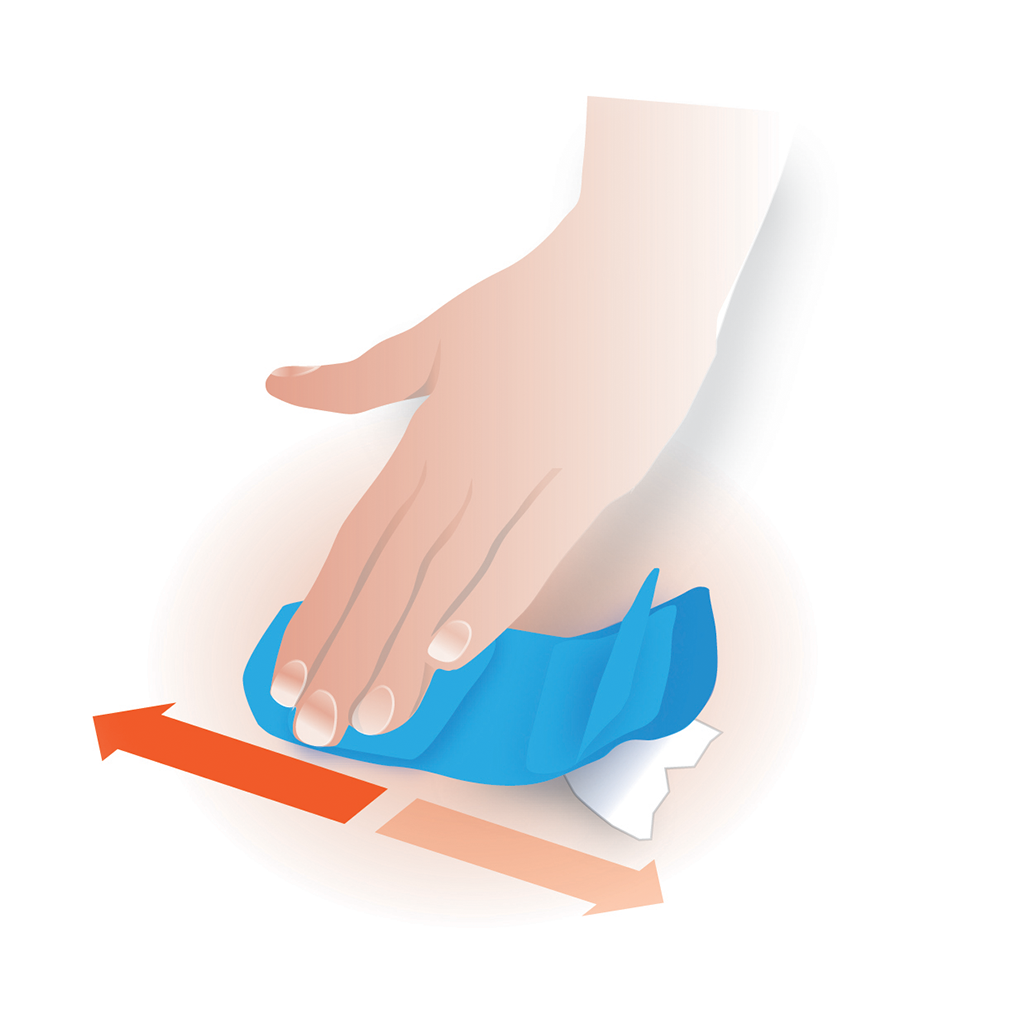
Removing 6D Tape
The recommended period the tape should remain on the skin is a duration of 3-10 days. The time that the adhesive of the tape holds may depend on the number and intensity of the treatment sessions. When the tape starts to come off, it can no longer be reattached to the skin. When removing the tape, first warm it up by rubbing it gently and then carefully roll the tape off along the skin to avoid skin irritation.
Optional Advanced Techniques for Optimized Lymphatic Drainage
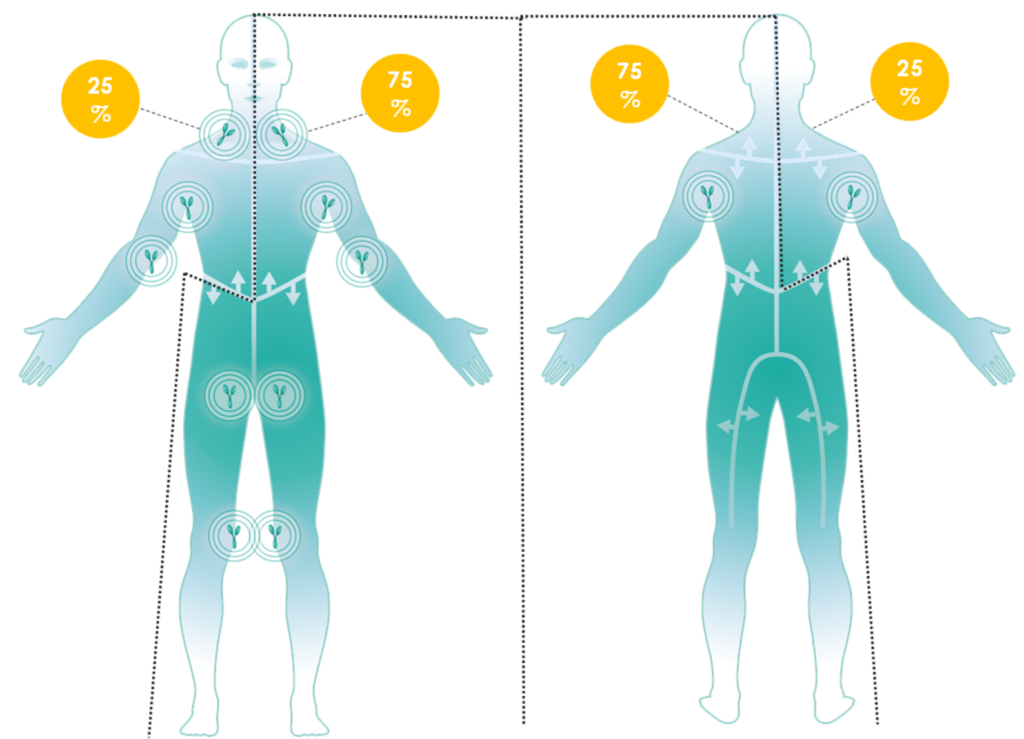
The lymphatic system returns lymph to the bloodstream. The thoracic duct drains approximately 75% of the body’s lymphatic fluid into the bloodstream via the left supraclavicular vein, while the right lymphatic duct drains the remaining 25% from the right upper body. Groin nodes filter lymph from the lower body before it enters the thoracic duct and the bloodstream.
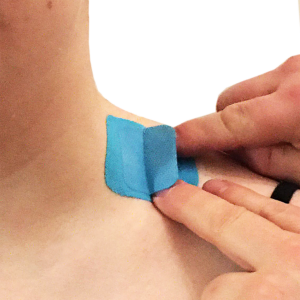
- Supraclavicular Lymph Node Area (Left): Place a one-handled strip above the left collarbone (supraclavicular area) to support systemic fluid movement when threating:
- Left side of the head
- Left side of the trunk
- Left upper extremity
- Both lower extremities
- Supraclavicular Lymph Node Area (Right): Place a one-handled strip above the right collarbone (supraclavicular area) to support systemic fluid movement when treating:
- Right side of the head
- Right side of the trunk
- Right upper extremity
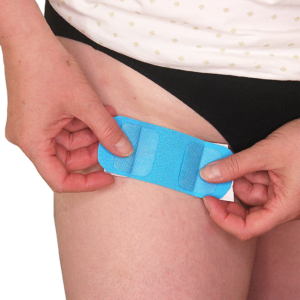
- Groin Lymph Node Area:
Place one or two handles strip to each groin area when treating:- Lower back
- Stomach area
- Lower extremity, place only to the groin above the affected side
Old Scar Taping
A scar can generally be classified as an old scar when it has fully matured and stabilized, typically 6–12 months after the injury or surgery that caused it.
Old scars can still be improved through mobilization techniques like 6D Tape, as the connective tissue remains in a state of slow, ongoing remodeling. This makes targeted interventions effective even years after the scar was formed.
Old scars are not static; they are in a constant state of remodeling as the body gradually reshapes the connective tissue. Over time, however, scars can become rigid and immobile due to the accumulation of dense, disorganized collagen fibers. This can restrict the natural elasticity of the skin and underlying tissues, potentially leading to discomfort, limited range of motion, and aesthetic concerns.
Scar tissue often forms adhesions with the underlying connective tissue, or fascia. These adhesions can reduce the sliding capacity of tissues, hinder elasticity, and restrict movement. In some cases, the tension created by these adhesions can even cause pain in areas distant from the scar due to tightened connective tissue chains.
Lymphatic flow, which occurs in the skin’s surface layers, may also be obstructed by scar adhesions, leading to swelling or lymphedema. Surgical procedures that involve lymph node removal can further exacerbate this issue, sometimes resulting in long-term swelling in the affected area.
Characteristics of an Old Scar
Mature Collagen Structure
- The scar tissue is predominantly composed of dense, organized collagen that has replaced the initial granulation tissue.
- The scar has lost the reddish or pink hue typical of newer scars and appears pale, white, or slightly discolored.
No Active Inflammation
- There are no signs of redness, swelling, or tenderness, which are common in the inflammatory and proliferative phases of healing.
Stable Size and Shape
- The scar has stopped changing in size, texture, or height, e.g., flattening of a raised scar or softening of a stiff scar has reached a plateau.
Tissue Rigidity
- The scar may feel firm or immobile, often due to adhesions or fibrotic tissue formation.
Reduced Vascularity
- Blood supply to the scar area has decreased, contributing to the scar’s paler or darker tone compared to the surrounding skin.
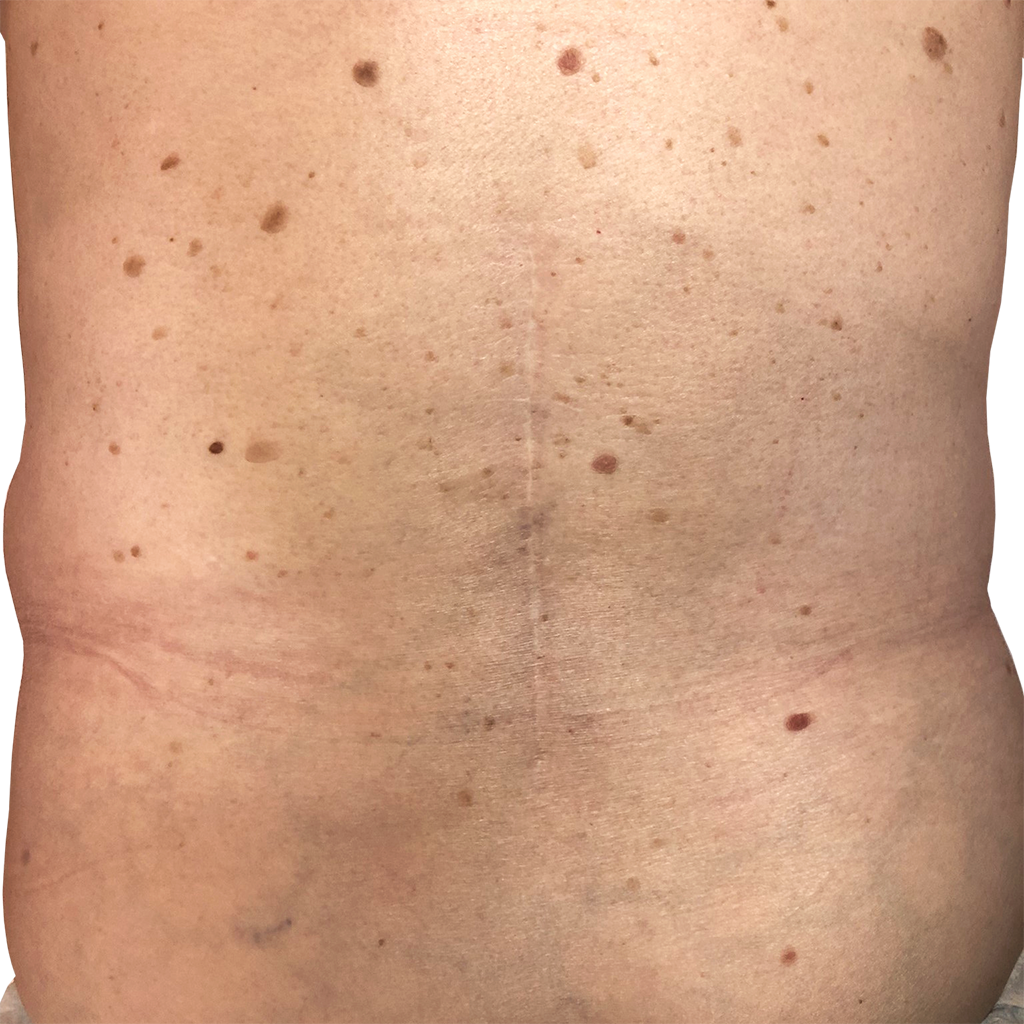
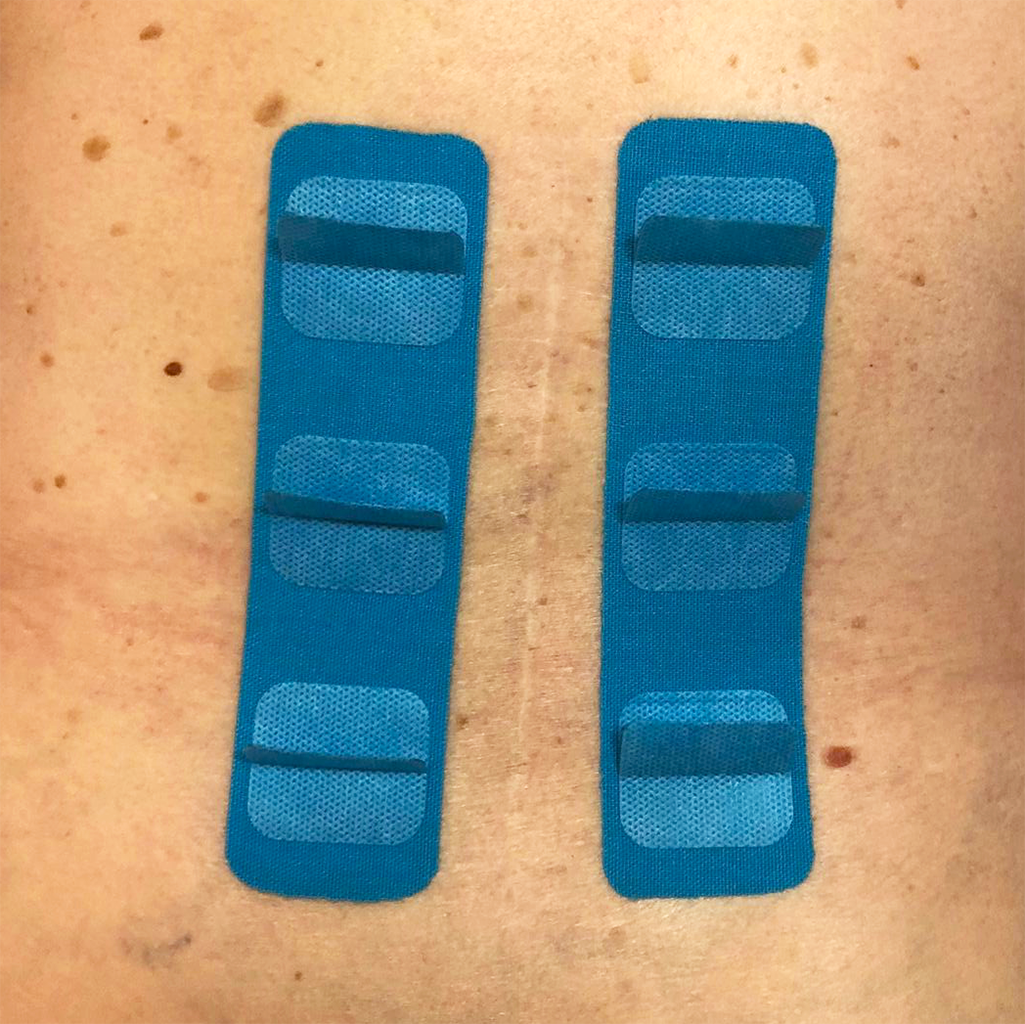
6D Taping around the old scar
This approach offers a significant advantage as it enables multidirectional stretching of the scar tissue by applying force from different sides. Taping around the scar is particularly suitable under the following conditions:
- Enhanced Stretching Force:
Leaving the scar uncovered while taping around it allows for stronger stretching forces to be applied directly to the scar tissue. - Adhesion Release:
Targeting tissues adjacent to the scar helps release adhesions, improving the mobility of connective tissues and enhancing overall flexibility. - Pain or Discomfort with Direct Taping:
When direct taping and mobilization may cause pain, irritation, or discomfort, taping around the scar provides a gentler alternative. - Alleviation of Referred Pain:
Releasing tension in the surrounding tissues can reduce discomfort or referred pain caused by scar-related adhesions and restricted connective tissue chains.
This method is ideal for promoting scar flexibility and overall tissue health while minimizing discomfort.
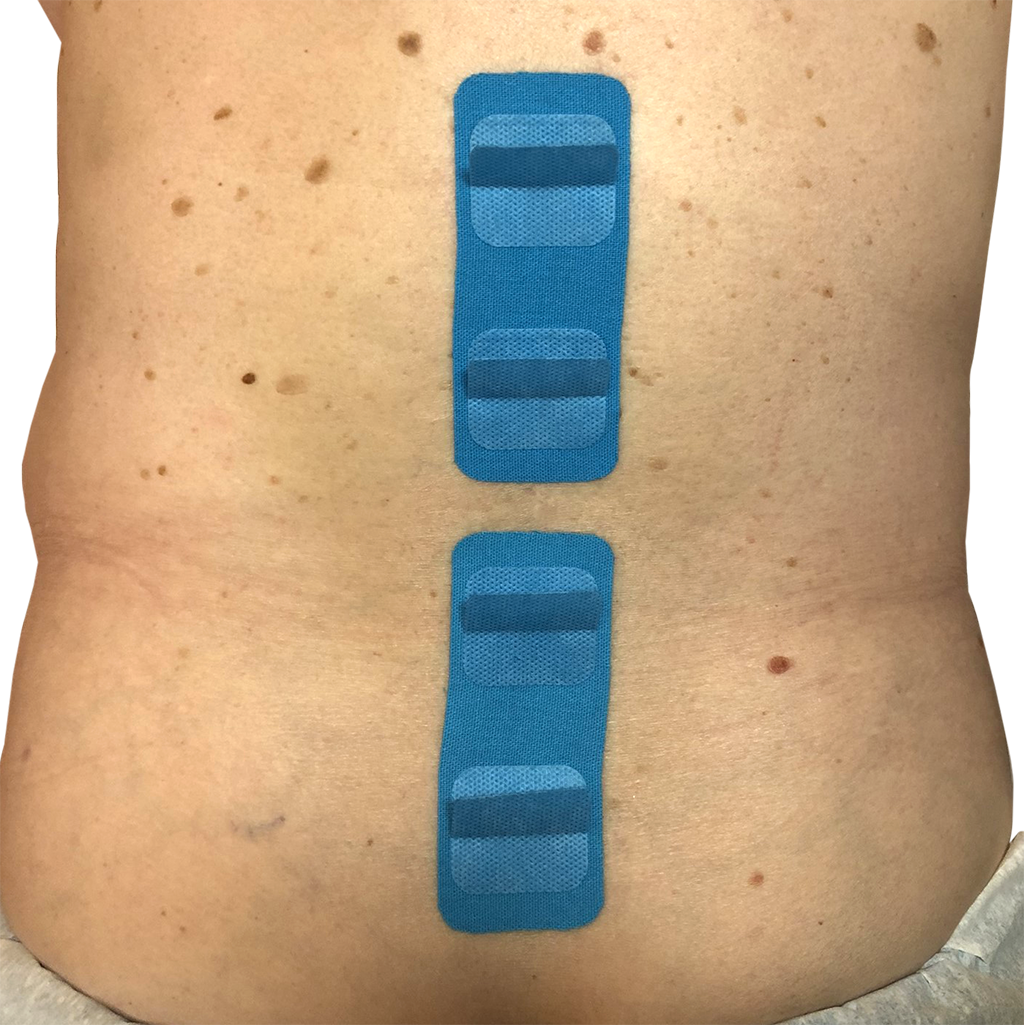
6D Taping directly over the old scar
Taping directly over scar tissue is particularly suitable for small body areas such as in areas like the fingers, toes, palms, or face where space limitations prevent the use of multiple strips. However, this technique is versatile and can be applied to scars of any size. This approach is ideal when the treatment is focused specifically on the scar and the underlying tissues.
Variations for small old scars and areas, depending on size, are as follows:
- A single one-handled strip.
- Half of a one-handled strip.
- One-third of a one-handled strip.
Variation for longer scars and areas: Use a one-handled strip or extend to multiple handled strips, depending on the size and length of the area. Strips can be combined or adjusted to suit specific dimensions and treatment requirements.
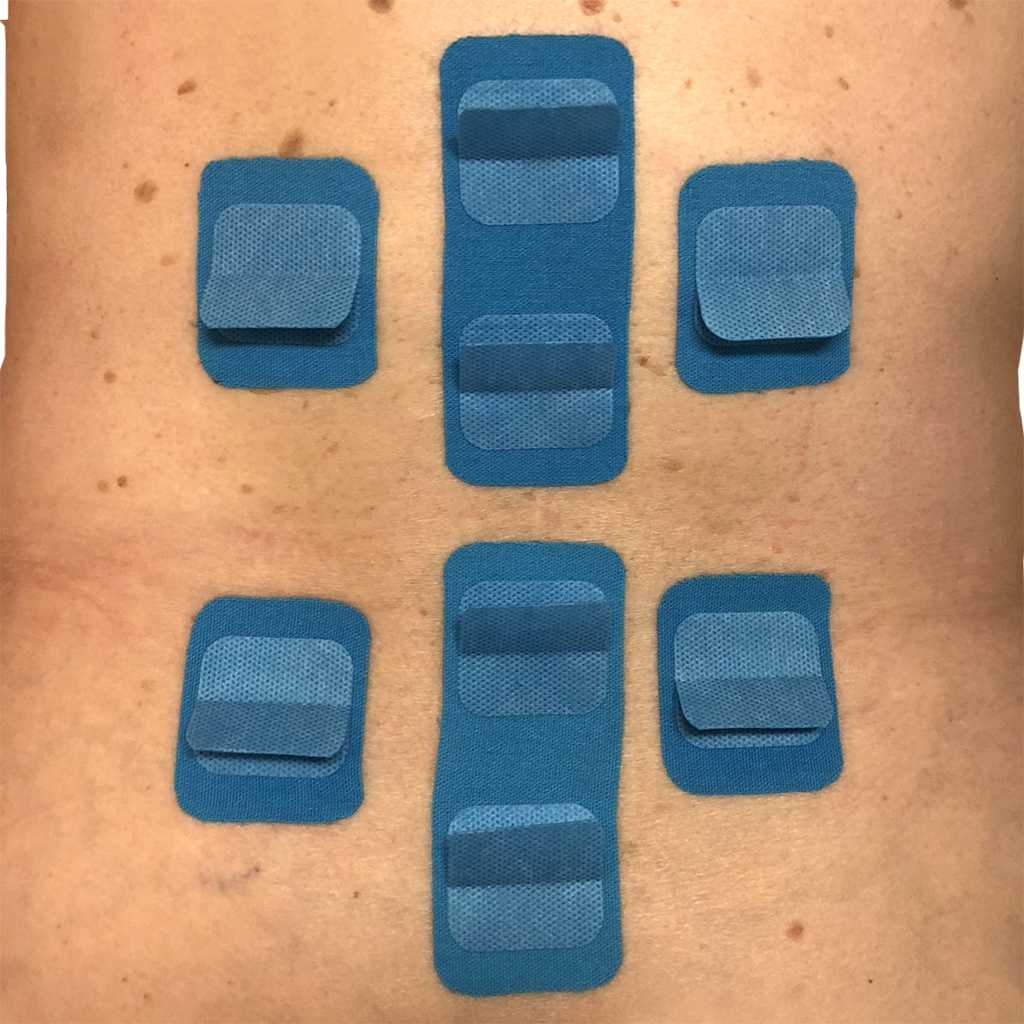
6D Taping Both Directly Around the Scar and Over the Scar
Combining direct taping over the scar with taping around the scar offers a comprehensive and highly effective treatment approach. This method leverages the unique benefits of both techniques, enabling the scar tissue to be mobilized in multiple dimensions for enhanced flexibility and healing.
By taping directly over the scar, 6D Tape applies gentle lifting, pulling, and twisting forces directly on the scar tissue, helping to release adhesions, improve collagen alignment, and enhance elasticity. At the same time, taping around the scar allows for multidirectional stretching and mobilization, targeting the surrounding tissues to reduce tension, alleviate referred pain, and promote better circulation and lymphatic flow.
With this combined approach, the scar can not only be pulled, lifted, and twisted vertically but also stretched in various directions across the x-, y-, and z-axes. This maximizes the mobilization effect, encourages continuous remodeling of the scar tissue, and optimizes overall tissue health.
This dual-method technique is particularly suitable for scars of all sizes and types, offering a tailored treatment to address both the scar and its impact on surrounding tissues.
Abdomen and C-Section Scars, Swelling, Wound Healing and Pain
Understanding C-Section and abdominal scars
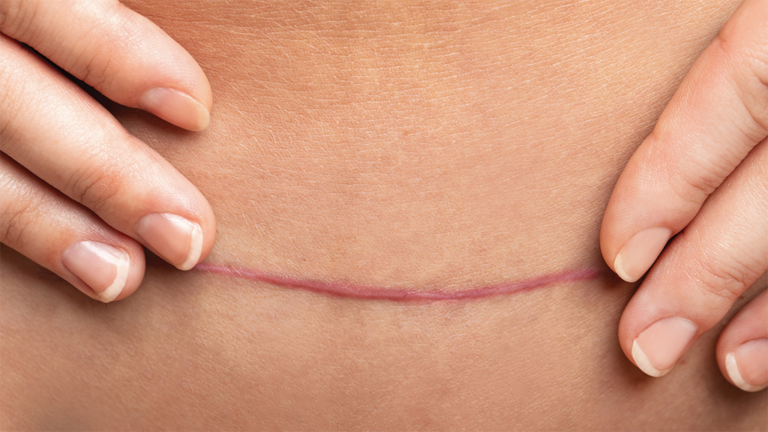
C-Section and abdominal scars are a result of surgical procedures that involve incisions in the abdominal area. A C-section scar occurs when a surgical incision is made to deliver a baby, typically located horizontally just above the pubic area. These scars are often flat or slightly raised and can lead to adhesions, tightness, and pain conditions in the tissue.
Abdominal scars may result from surgeries such as hernia repair, appendectomy, or other procedures involving the abdominal cavity. Depending on the size and depth of the incision, these scars can vary in appearance and may cause swelling, stiffness, and pain during the healing process.
Both types of scars benefit from therapeutic care to promote healing, improve flexibility, and reduce the likelihood of complications such as adhesions or chronic pain.
During the Early Recovery Phase - Stitches in Place
- Apply 6D Tape near but not directly on the incision to reduce swelling and support lymphatic drainage without disturbing the healing wound. Ensure the tape is placed at least 3 cm away from the stitches to avoid irritation or tension on the incision.
- Activate 6D Tape every 3-4 hours for 5 to 10 minutes per session.
Post-Surgery Recovery - After Stitches Are Removed
- Begin taping the incision area 2–4 weeks after surgery, once the wound is fully healed, stitches are removed, and the skin is intact.
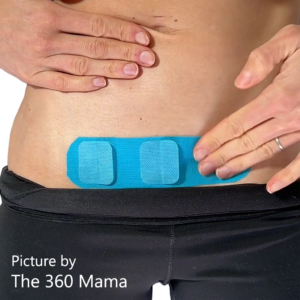
- Position the tape directly over the healed scar, applying it lengthwise to cover the entire incision.
- Wear each application for 3–10 days, allowing continuous therapeutic benefits. Replace as needed. Continue using the tape for 8–12 weeks or until swelling subsides and scars improve.
- Activate 6D Tape every 3-4 hours for 5 to 10 minutes per session.
Additional Notes:
- Hydration: Maintain proper hydration to support the body’s natural lymphatic processes.
- Consultation: If in doubt, consult a healthcare professional before beginning 6D Tape therapy, particularly for severe injuries or post-surgical care.
- Important: Do not apply tape directly over stitches, open wounds, or inflamed skin as the treated area must remain stable and free from irritation to ensure proper healing.